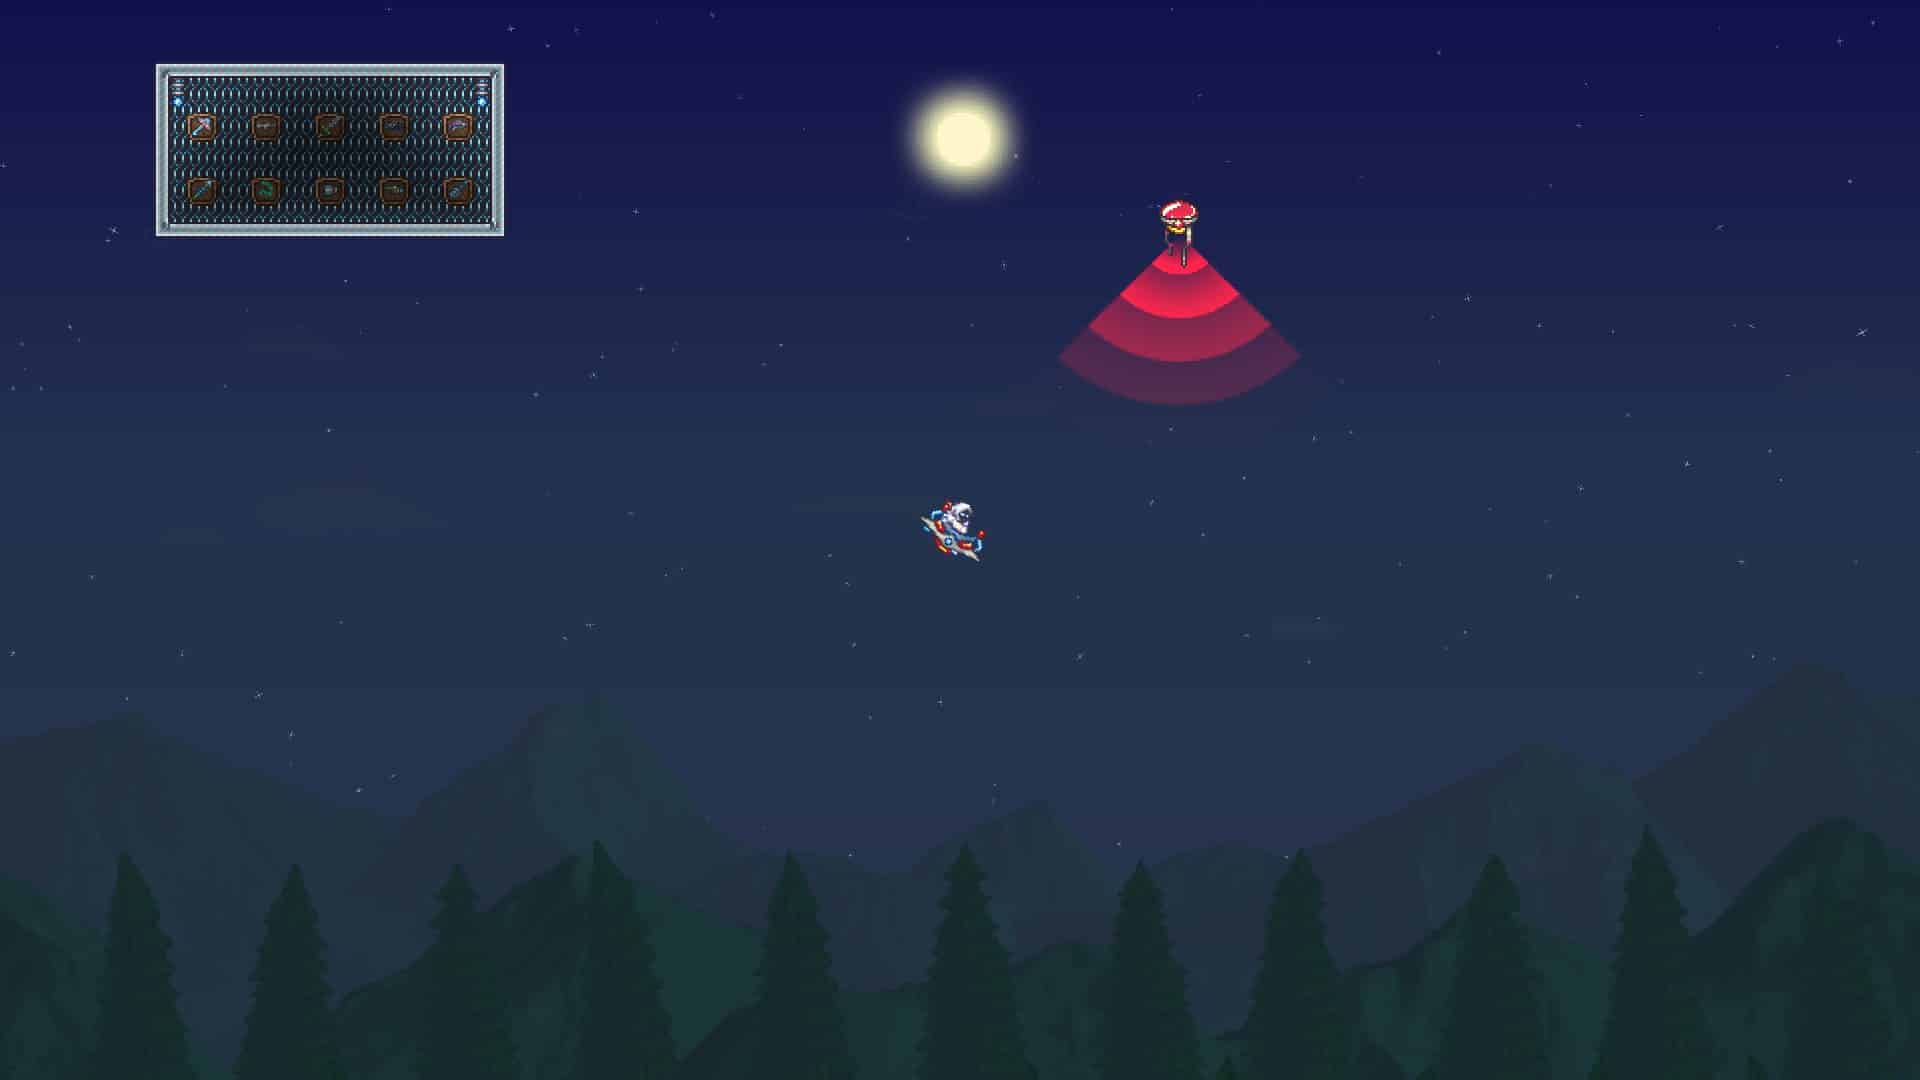
Behind Terraria’s facade of letting players be creative with what they build, the game’s lore runs deep. The storyline’s main point is to help the Dryad restore order to your world, which involves fighting bosses.
From Pre-Hardmode to Hardmode, you’ll encounter several challenging enemies, from floating eyes and gigantic worms to aggressive plants and pillars. All of them are crucial for progressing and ultimately finishing the game.
This guide will talk about every boss in Terraria. We’ve provided all you have to know, including all ways to spawn, items dropped, and general fighting tips.
How Many Bosses Are There in Terraria?
Excluding those from Martian Madness and Pirate Invasion‘s Martian Saucer and Flying Dutchman, there are 19 bosses. Thirteen are necessary for progression, five are optional, and one is exclusive in a secret world seed.
As a starting player, it’s generally best to gather pieces of Wood to make Platforms for building your Arena. Moreover, there are Pre-Hardmode armor sets in Terraria that you should wear to increase your survivability.
Pre-Hardmode Bosses in Order
King Slime (optional)

| Health (Classic / Expert / Master) | Damage (Classic / Expert / Master) | Knockback Immunity | Defense |
| 2000 / 2800 / 3570 | 40 / 64 / 96 | Total | 10 |
The King Slime may be less lethal than the Eater of Worlds or Brain of Cthulhu, but it can annoy new players. Once in your world, the boss will bounce back and forth, occupying some significant space. Moreover, the King Slime will teleport to your location should you attempt to escape.
Dealing with this boss requires platforms to lessen your risk of taking damage, as his bounce attack is hard to dodge. Platforms are relatively easy to craft, so there’s no need to overthink how many to place. But it’s a good rule to make your arena as long as your PC screen’s size to be sure.
To spawn the Slime King, you can either:
- Kill 150 Slimes during the Slime Rain event.
- Use a Slime Crown, crafted from 20 Gels and 1 Gold Crown or Platinum Crown at a Demon Altar or Crimson Altar.
Note: King Slime is immune to Confused, Poisoned, and Shimmering debuffs. As more hits he takes, he’ll shrink and spawn regular Slimes.
Defeating King Slime will yield various rewards, depending on your Terraria difficulty. Aside from 1 Gold Coin / 2 Gold Coins & 50 Silver Coins, the table below shows all possible drops:

| Classic | Expert | Master |
| Lesser Healing Potion (five to 15 pieces, 100%) | 1 Gold Coin (100%) | 1 Gold Coin (100%) |
| Solidifier (100%) | Lesser Healing Potion (five to 15 pieces, 100%) | King Slime Relic (100%) |
| Slime Gun (66.67%) | Royal Gel (100%) | Lesser Healing Potion (five to 15 pieces, 100%) |
| Ninja Hood (33.33%) | Solidifier (100%) | Royal Gel (100%) |
| Ninja Pants (33.33%) | Treasure Bag (100%) | Solidifier (100%) |
| Ninja Shirt (33.33%) | Ninja Hood (67%) | Treasure Bag (100%) |
| Slime Hook (33.33%) | Ninja Pants (67%) | Ninja Hood (67%) |
| Slimy Saddle (25%) | Ninja Shirt (67%) | Ninja Pants (67%) |
| King Slime Mask (14.29%) | Slime Gun (50%) | Ninja Shirt (67%) |
| King Slime Trophy (10%) | Slime Hook (50) | Slime Gun (50%) |
| Slimy Saddle (50%) | Slime Hook (50%) | |
| King Slime Mask (14.29%) | Slimy Saddle (50%) | |
| King Slime Trophy (10%) | Royal Delight (25%) | |
| King Slime Mask (14.29%) | ||
| King Slime Trophy (10%) |
Eye of Cthulhu
| Health (Classic / Expert / Master) | Damage (Classic / Expert / Master) | Knockback Immunity | Defense |
| 2800 / 3640 / 4641 | 15 / 30 / 45 (First Phase until 1400 / 2366 / 3016) 23 / 36 (40 when below 145 HP) / 54 (60 when below 185) | Total | 12 (first phase) 0 (second phase) |
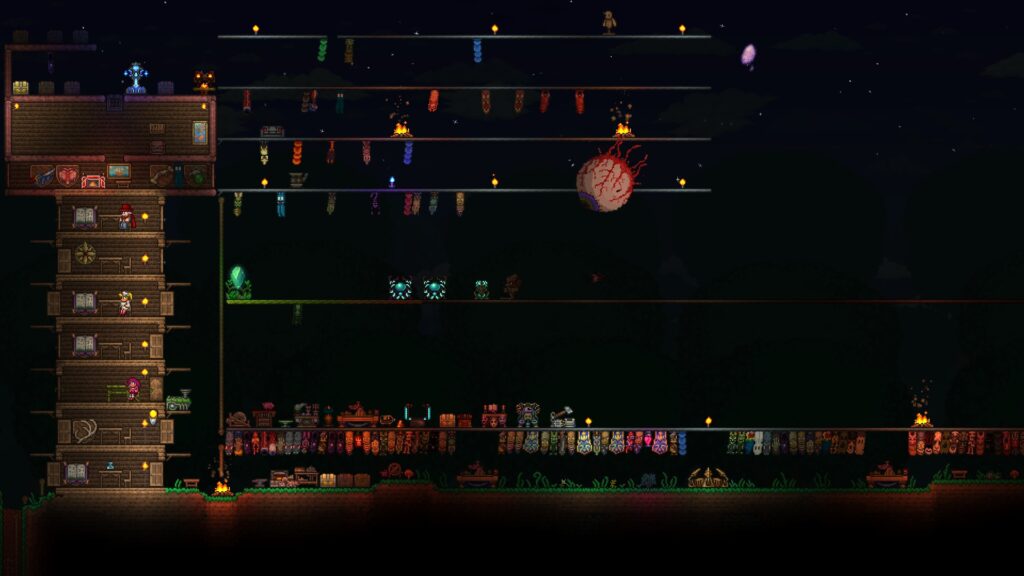
The Eye of Cthulhu is one boss some players may not expect to spawn, especially if they’re progressing a little quicker. Facing this enemy is crucial as it’s the key to upgrading your weapons to your world’s evil biome equivalent. For example, you can craft the Blood Butcherer from Crimson or Light’s Bane from Corruption.
As always, you need a flat space to fight the Eye of Cthulhu. The same rules apply with platforms, only adding more rooms to jump from and to. The boss is more than enthusiastic to reap your life essence, as it spawns the Servants of Cthulhu (Demon Eyes but can phase through walls).
Once it shows its teeth, you’re close to defeating the Eye of Cthulhu, but it also means the boss’ attack will be more aggressive. While there are no additional eyes to care for, it’s best to have good mobility before contending this murderous eyeball.
To spawn the Eye of Cthulhu, you can either:
- Wait for the boss, with a 33.33% chance of spawning naturally. But you need 200 total HP, three or more Town NPCs, and a minimum 10 defense.
- Use a Suspicious Looking Eye. One way is to craft the boss-summoning item by bringing 6 Lenses at a Crimson Altar or Demon Altar. Alternatively, loot Frozen Chests, Gold Chests, and Ivy Chests (20%) in the Underground.
Note: The Eye of Cthulhu is immune to the Confused debuff. If you have the Bee Keeper from Queen Bee, it won’t work.

| Classic | Expert | Master |
| Crimson-exclusive: Crimson Seeds (one to three pieces, 100%) Crimtane Ore (30 to 90 pieces, 100%) | 3 Gold Coins (100%) | 0x33’s Aviators (100%) |
| Corruption-exclusive: Demonite Ore (30 to 90, pieces, 100%) Corrupt Seeds (one to three pieces, 100%) Unholy Arrow (20 to 50 pieces, 100%) | Badger’s Hat (defeat Wall of Flesh within the day, 100%) | Badger’s Hat (defeat Wall of Flesh within the day, 100%) |
| Badger’s Hat (defeat Wall of Flesh within the day, 100%) | Crimson-exclusive: Crimtane Ore (30 to 90 pieces, 100%) Crimson Seeds (one to three pieces, 100%) | Crimson-exclusive: 3 Gold Coins (100%) Crimson Seeds (one to three pieces, 100%) Crimtane Ore (30 to 90 pieces, 100%) |
| Lesser Healing Potion (five to 15 pieces, 100%) | Corruption-exclusive: Corrupt Seeds (one to three pieces, 100%) Demonite Ore (30 to 90 pieces, 100%) Unholy Arrow (20 to 50 pieces, 100%) | Corruption-exclusive: Corrupt Seeds (one to three pieces, 100%) Demonite Ore (30 to 90 pieces, 100%) Unholy Arrow (20 to 50 pieces, 100%) |
| Eye of Cthulhu Mask (14.29%) | Lesser Healing Potion (five to 15 pieces, 100%) | Eye of Cthulhu Relic (100%) |
| Eye of Cthulhu Trophy (10%) | Shield of Cthulhu (100%) | Lesser Healing Potion (five to 15 pieces, 100%) |
| Binoculars (2.5%) | Treasure Bag (100%) | Shield of Cthulhu (100%) |
| Eye of Cthulhu Mask (14.29%) | Treasure Bag (100%) | |
| Eye of Cthulhu Trophy (10%) | Suspicious Grinning Eye (25%) | |
| Binoculars (3.33%) | Eye of Cthulhu Mask (14.29%) | |
| Eye of Cthulhu Trophy (10%) | ||
| Binoculars (3.33%) |
Deerclops (optional)

| Health (Classic / Expert / Master) | Damage (Classic / Expert / Master) | Knockback Immunity | Defense |
| 7000 / 11900 / 15172 | Deerclops have four attacks: Melee (20 / 40 / 60) Ice Spike (26 / 52 / 76) Debris (36 / 72 / 108) Shadow Hand (20 / 40 / 60) | Total | 10 |
The Deerclops is originally a boss from another game Terraria has crossover with, Don’t Starve Together. The loot you get from your effort is something to look forward to after defeating this monster.
While fighting the Deerclops is unnecessary, we recommend doing it anyway because of the weapon drop. Summoners, Rangers, and Magic users will benefit from Houndius Shootius, Pew-matic Horn, and Weather Pain. But with all good output, your input must stay at the top.
First, prepare a multi-floor arena with stairs on each end (that must be climbable by Deerclops). Note that the boss has several attacks, including Ice Spikes, Debris, and Shadow Hand. By building said stairs, you’re reducing the chance of him using the ranged Debris ability. But be wary not to build too high, or Deerclops will use the Shadow Hand attack.
When fighting, you should dodge Deerclops at all times. Reducing the chance of facing his two ranged attacks leaves you with the Slow debuff-inflicting Roar and Icy Spikes, which are predictable. From your previous Eye of Cthulhu fight, consider movement accessories and lots of Healing Potions.
You may spawn the Deerclops through:
- Staying in the Surface Ice biome where Blizzard will randomly occur. It should be midnight. Moreover, you should have a minimum of nine defense or 200 HP. The spawn point should also be far away from any Town NPCs.
- Using the Deer Thing, which you can make by combining 1 Lens, 3 Flinx Furs, and 5 Demonite Ores at a Crimson Altar or Demon Altar.
Note: The Deerclops has debuff immunity to Confused and Shimmering. You should watch out for Slow and Frozen debuffs you may get while battling the boss.

| Classic | Expert | Master |
| Healing Potion (five to 15 pieces, 100%) | 10 Gold Coins (100%) | 10 Gold Coins (100%) |
| Eye Bone (33%) | Bone Helm (100%) | Bone Helm (100%) |
| Eyebrella (33%) | Healing Potion (five to 15 pieces, 100%) | Deerclops Relic (100%) |
| Radio Thing (33%) | Treasure Bag (100%) | Healing Potion (five to 15 pieces, 100%) |
| Houndius Shootius (25%) | Eye Bone (33%) | Treasure Bag (100%) |
| Lucy the Axe (25%) | Eyebrella (33%) | Eye Bone (33%) |
| Pew-matic Horn (25%) | Radio Thing (33%) | Eyebrella (33%) |
| Weather Pain (25%) | Houndius Shootius (25%) | Radio Thing (33%) |
| Deerclops Mask (14.29%) | Lucy the Axe (25%) | Deerclops Eyeball (25%) |
| Deerclops Trophy (10%) | Pew-matic Horn (25%) | Houndius Shootius (25%) |
| Dizzy’s Rare Gecko Chester (7.14%) | Weather Pain (25%) | Lucy the Axe (25%) |
| Deerclops Mask (14.29%) | Pew-Matic Horn (25%) | |
| Deerclops Trophy (10%) | Weather Pain (25%) | |
| Dizzy’s Rare Gecko Chester (7.1%) | Deerclops Mask (14.29%) | |
| Deerclops Trophy (10%) | ||
| Dizzy’s Rare Gecko Chester (7.1%) |
Eater of Worlds

| Health (Classic / Expert / Master) | Damage (Classic / Expert / Master) | Knockback Immunity | Defense (Classic / Expert / Master |
| 10050 (desktop, mobile, console) / 7500 (3DS, old-gen consoles) / 15120 / 19224 | Eater of Worlds is an entity with multiple damaging hitboxes: Head (22 / 48 / 72) Body (13 / 20 / 31) Tail (11 / 17 / 26) | Total | Each parts have varying defense: Head (2 / 4) Body (4 / 6) Tail (8 / 10) |
While many segmented worms will try taking you down in the Corruption biome, consider Eater of Worlds the final boss (in Pre-Hardmode). This massive murderous flesh buries itself from the ground, launching a surprise attack, then repeating the process until you’re down.
If you’re victorious over the Eye of Cthulhu, we recommend converting your Demonite Bars into Light’s Bane or Demon Bow. Both weapons offer higher DPS than any other of their metal counterparts.
Fighting the Eater of Worlds is as simple as building an elevated arena (made from platforms you can climb on). However, make sure it’s within the biome, or the boss will disappear. We also recommend doing it on the surface, as tracking the Eater of Worlds underground is harder.
As soon as the Eater of Worlds takes damage, it’ll soon split into different segments. But you’ll manage by keeping or upgrading your movement accessories and having a good armor set.
Spawning the Eater of Worlds can be easy as:
- Breaking three Shadow Orbs from the Underground Corruption.
- Using a Worm Food, which you can make by combining 15 Rotten Chunks and 30 Vile Powders at a Crimson Altar or Demon Altar.
Note: The Eater of Worlds has an immunity to Confused debuff. Moreover, there’s a 5% chance the boss will inflict the Weak debuff on contact in non-Classic difficulties.

| Classic | Expert | Master |
| Demonite Ore (zero to 134 pieces (desktop, mobile, console)) / (zero to 100 pieces (3DS, old-gen consoles)), 100%) | 3 Gold Coins (100%) | 3 Gold Coins (100%) |
| Lesser Healing Potion (five to 15 pieces, 100%) | Demonite Ore (80 to 110 pieces, 100%) | Demonite Ore (110 to 135 pieces, 100%) |
| Shadow Scale (zero to 134 pieces (desktop, mobile, console)) / (zero to 100 pieces (3DS, old-gen consoles)), 100%) | Lesser Healing Potion (five to 15 pieces, 100%) | Shadow Scale (30 to 50 pieces, 100%) |
| Eater of Worlds Mask (14.29%) | Shadow Scale (20 to 40 pieces, 100%) | Eater of Worlds Relic (100%) |
| Eater of Worlds Trophy (10%) | Treasure Bag (100%) | Lesser Healing Potion (five to 15 pieces, 100%) |
| Eater’s Bone (5%) | Worm Scarf (100%) | Treasure Bag (100%) |
| Eater of Worlds Mask (14.29%) | Worm Scarf (100%) | |
| Eater of Worlds Trophy (10%) | Writhing Remains (25%) | |
| Eater’s Bone (5%) | Eater of Worlds Mask (14.29%) | |
| Eater of Worlds Trophy (10%) | ||
| Eater’s Bone (5%) |
Brain of Cthulhu
| Health (Classic / Expert / Master) | Damage (Classic / Expert / Master) | Knockback Immunity | Defense |
| 3250 / 5525 / 7029 | 30 / 54 / 81 | Partial, 55% (desktop, mobile, console) / 50% (3DS, old-gen consoles) / 60% / 64% (65% in second form) | 14 |
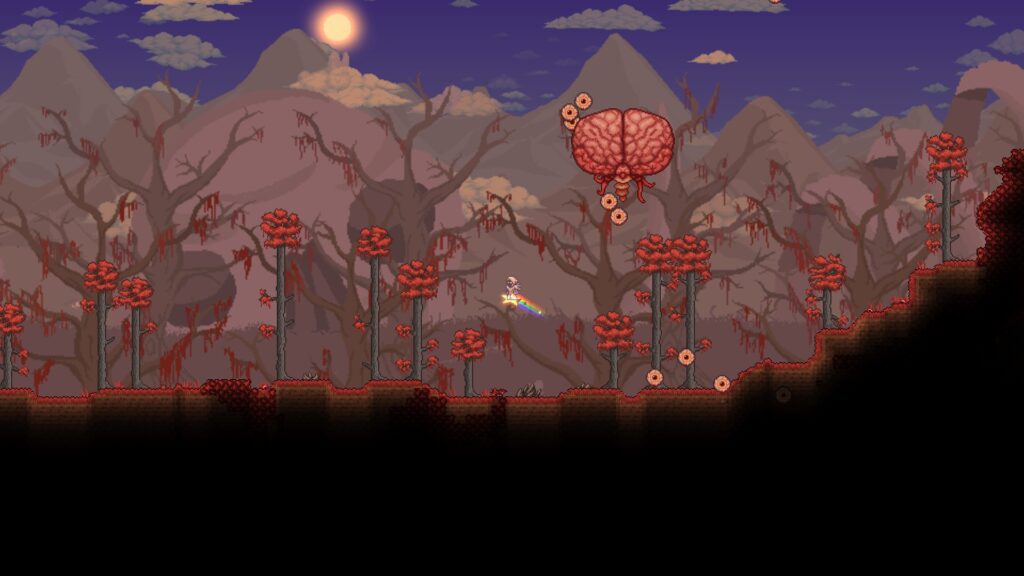
In Crimson worlds, the Brain of Cthulhu is a must-fight boss for obtaining the same gear as its Corruption counterpart. So, if you choose the Eater of Worlds, that still counts as progression. But from our experience, the former can be hard to beat because of its unpredictable nature.
In reality, it’s easy to beat the Crimson boss. The Underground Crimson has a large space where you can create multi-level platforms to dodge the Brain of Cthulhu and its Creepers’ attacks. You should have a reliable hook or mount from normal progression for total control and knockback resistance.
The first phase involves the Brain’s Creepers, where they’ll reposition every time the boss teleports. Defeating every minion will drop Tissue Samples – essential for crafting the Crimson armor set. Afterward, the Brain of Cthulhu will become aggressive, teleporting faster. The trick is to keep moving and be alert to its next spawn to pre-fire.
To spawn the Brain of Cthulhu, you can:
- Destroy three Crimson Hearts from the Underground Crimson.
- Use the Bloody Spine. You can craft the item by bringing 15 Vertebra and 30 Vicious Powder at a Crimson Altar or Demon Altar.
Note: The Brain of Cthulhu won’t suffer from inflicted Confused debuff. However, both Creepers and the boss may inflict various debuffs upon contact in Expert and Master modes. Moreover, the Brain gets trickier to handle in the second phase, where mirror decoys will start appearing.

| Classic | Expert | Master |
| Crimtane Ore (40 to 90 pieces, 100%) | 1 Gold Coin (100%) | 1 Gold Coin (100%) |
| Lesser Healing Potion (five to 15 pieces, 100%) | Brain of Confusion (100%) | Brain of Confusion (100%) |
| Brain of Cthulhu Mask (14.29%) | Crimtane Ore (80 to 110 pieces, 100%) | Brain of Cthulhu Relic (100%) |
| Brain of Cthulhu Trophy (10%) | Lesser Healing Potion (five to 15 pieces, 100%) | Crimtane Ore (110 to 135 pieces, 100%) |
| Bone Rattle (5%) | Tissue Sample (20 to 40 pieces, 100%) | Lesser Healing Potion (five to 15 pieces, 100%) |
| Treasure Bag (100%) | Tissue Sample (30 to 50 pieces, 100%) | |
| Brain of Cthulhu Mask (14.29) | Treasure Bag (100%) | |
| Brain of Cthulhu Trophy (10%) | Brain in a Jar (25%) | |
| Bone Rattle (5%) | Brain of Cthulhu Mask (14.29%) | |
| Brain of Cthulhu Trophy (10%) | ||
| Bone Rattle (5%) |
Queen Bee
| Health (Classic / Expert / Master) | Damage (Classic / Expert / Master) | Knockback Immunity | Defense (Classic / Expert / Master) |
| 3400 / 4760 / 6069 | Queen Bee have two attacks: Melee (30 / 54 / 81) Ranged (22 / 44 / 66) | Total | 8 / 8 to 28 (health-dependent) |
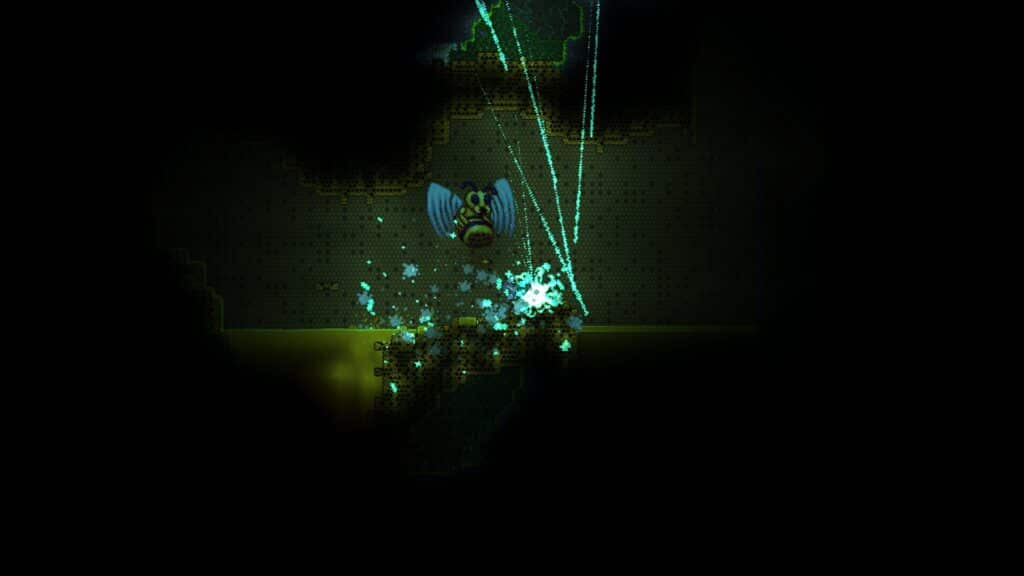
Technically, you can fight whichever boss you like to go down first. But in the case of Queen Bee, traversing the Underground Jungle is dangerous because of Hornets and Man-eaters. The former inflicts the Poisoned debuff, draining health over time and reducing regeneration capabilities. While less dangerous, the latter can launch surprise attacks if you’re not observant.
Regardless, fighting the Queen Bee requires at least your pre-obtained Crimson or Shadow armor sets and 300 HP minimum. If you’re not following the Boss Progression Guide, you may opt for Gold or Platinum armor instead.
The Queen Bee’s attacks include firing a Poisonous Stinger, contact damage from the boss, and chasing bees. We recommend setting up an arena with another jumpable level. Its purpose is to reach her when she’s releasing homing bees. Then let the sentry, like the Explosive Trap Rod, pop them.
Once the previous attack is finished, the Queen Bee will charge from left to right, which is predictable after a while. This point is where your climbable platforms come into play. Time everything right, pop her as quickly as possible, and you’ll win.
Spawning the Queen Bee is easy (but sometimes annoying):
- Pop a Larva you can find inside walls of Bee Hives. Be careful around this area, as you may accidentally summon the boss.
- Use the Abeemination. You can make it by combining 1 Bottled Honey & Stinger, 5 Hives, and 5 Honey Blocks. No crafting needed is necessary in this case.
Note: You can’t inflict the Confused and Poisoned debuff on Queen Bee.

| Classic | Expert | Master |
| Bee Wax (16 to 26 pieces, 100%) | 10 Gold Coins (100%) | 10 Gold Coins (100%) |
| Bottled Honey (five to 15 pieces, 100%) | Bee Wax (17 to 29 pieces, 100%) | Bee Wax (17 to 29 pieces, 100%) |
| Beenade (ten to 30 pieces, 75%) | Beenade (ten to 29 pieces, 100%) | Beenade (ten to 29 pieces, 100%) |
| Bee Gun (33%) | Bottled Honey (five to 15 pieces, 100%) | Bottled Honey (five to 15 pieces, 100%) |
| Bee Keeper (33%) | Hive Pack (100%) | Hive Pack (100%) |
| Hive Wand (33%) | Hive Wand (100%) | Hive Wand (100%) |
| Honey Comb (33%) | Treasure Bag (100%) | Queen Bee Relic (100%) |
| The Bee’s Knees (33%) | Bee Gun (33%) | Treasure Bag (100%) |
| Queen Bee Mask (14.29%) | Bee Keeper (33%) | Bee Gun (33%) |
| Bee Hat (11%) | Bee Hat (33%) | Bee Hat (33%) |
| Bee Pants (11%) | Bee Pants (33%) | Bee Keeper (33%) |
| Bee Shirt (11%) | Bee Shirt (33%) | Bee Pants (33%) |
| Queen Bee Trophy (10%) | Honey Comb (33%) | Bee Shirt (33%) |
| Nectar (6.7%) | The Bee’s Knees (33%) | Honey Comb (33%) |
| Honeyed Goggles (5%) | Queen Bee Mask (14.29%) | The Bee’s Knees (33%) |
| Honeyed Goggles (11%) | Sparkling Honey (25%) | |
| Nectar (11%) | Queen Bee Mask (14.29%) | |
| Queen Bee Trophy (10%) | Honeyed Goggles (11%) | |
| Nectar (11%) | ||
| Queen Bee Trophy (10%) |
Skeletron

| Health (Classic / Expert / Master) | Damage (Classic / Expert / Master) | Knockback Immunity | Defense (Classic / Expert / Master) | |
| Skeletron Head | 4400 / 8800 / 11220 | 32 / 70 (68 with Skull) / 105 (102 with Skull) | Total | 10 (0 if spinning; 9999 at daytime) / 10 base + 25/hand (0 if spinning + 25/hand; 9999 at daytime) / 10 base + 25/hand (0 if spinning + 25/hand; 9999 at daytime) |
| Skeletron Hand | 600 / 1560 / 1989 | 20 / 44 / 66 | Total | 14 |
What we don’t like about the Skeletron is its lethality in daytime – capable of one-shotting if you’re too slow at defeating the boss. However, you don’t have to fight it when the sun shines. Our advice: start by 7:30 PM.
Before the fight, it’d help if you build a multi-level platform that’s lengthy enough to dodge the Skeletron’s attacks. Moreover, fast-moving Mounts are more than welcome as an alternative to movement-enhancing accessories.
Depending on your class, we recommend opting for the following Pre-Hardmode armor sets:
- Crimson or Shadow for melee
- Jungle for magic
- Fossil for ranged
- Bee for summoner
Yoyos and Flails are good weapons as both specialize in damaging multiple hitboxes. If you’re dodging skills isn’t competitive enough, that’s okay. You can survive the Skeletron’s blows, and recovering with a Lesser Healing Potion can help. You may also consider Campfires, Heart Lanterns, and Sunflowers for extra regeneration and movement speed. Add combat potions, too, if you will.
There are two ways you can spawn this boss in Terraria:
- Talk to the Old Man at the Dungeon’s entrance. We recommend having more than 300 HP to do this. Afterward, the NPC will offer to “curse” him, spawning Skeletron.
- Equip the Clothier Voodoo Doll in the Accessory Slot and kill the Clothier NPC. You can get the item from defeating Angry Bones and Dark Casters inside the Dungeon (0.33% on all modes).
Note: Skeletron’s Head is immune to Blood Butchered, Confused, Penetrated, Poisoned, and Tentacle Spike debuffs. Its Hands will absorb the rest of the debuffs except Confused and Poisoned. In Expert and Master Modes, you’ll get the Bleeding debuff upon contact (Head). The Slow debuff has a halved chance (Hands), albeit still deadly to contract.

| Classic | Expert | Master |
| Healing Potion (five to 15 pieces, 100%) | 5 Gold Coins (100%) | Bone Glove (100%) |
| Chippy’s Couch (14.29%) | Bone Glove (100%) | 5 Gold Coins (100%) |
| Skeletron Mask (14.29%) | Healing Potion (five to 15 pieces, 100%) | Healing Potion (five to 15 pieces, 100%) |
| Skeletron Hand (12.24%) | Treasure Bag (100%) | Skeletron Relic (100%) |
| Book of Skulls (10.5%) | Book of Skulls (33%) | Treasure Bag (100%) |
| Skeletron Trophy (10%) | Skeletron Hand (33%) | Book of Skulls (33%) |
| Skeletron Mask (33%) | Skeletron Hand (33%) | |
| Chippy’s Couch (14.29%) | Skeletron Mask (33%) | |
| Skeletron Trophy (10%) | Possessed Skull (25%) | |
| Chippy Couch (14.29%) | ||
| Skeletron Trophy (10%) |
Wall of Flesh

| Health (Classic / Expert / Master) | Damage (Classic / Expert / Master) | Knockback Immunity | Defense (Classic / Expert / Master) |
| 8000 / 11200 / 14280 | 50 / 150 / 225 | Total | 12 / 18 /18 |
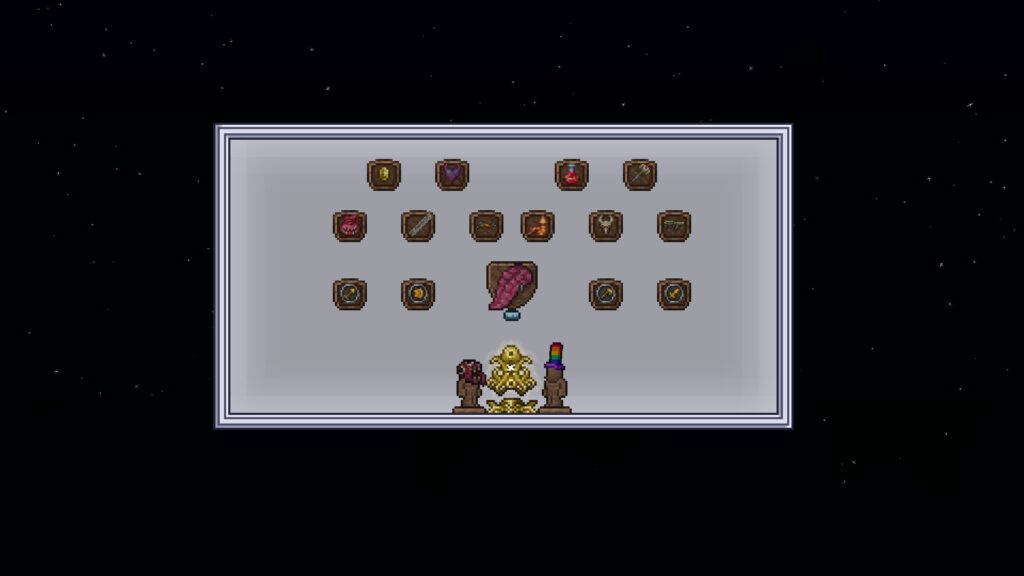
The Wall of Flesh in Terraria is the most resilient Pre-Hardmode boss before you go Hardmode. But before that, we recommend keeping Corruption and Crimson at bay by checking this guide. We’ve provided a step-by-step process on containing both evil biomes’ spread upon entering a more challenging gameplay.
First, prepare a long arena (about 600 to 800 regular blocks). This boss in Terraria will spawn from the Underworld’s map edge you’re closest to. It’s also pretty tanky, as it combines with The Hungry.
When dealing with the Wall of Flesh, we generally recommend equipping a matching armor set. The Molten armor will be your best choice, with a pair of Night’s Edge and melee-boosting accessories and potions. Gather as much DPS source as you can before running out of space.
Spawning the Wall of Flesh in Terraria is straightforward. You have to throw the Guide Voodoo Doll at the Lava. Remember to use Obsidian Skin Potion to prevent lava contact damage.
Note: Confused, On Fire!, and Hellfire are all debuffs the Wall of Flesh is immune towards. When fighting the boss, you’re automatically inflicted with the Horrified debuff, killing you after using any recall items. The Tongue debuff may also appear, pulling you directly to the Wall of Flesh at a disadvantageous position.
| Classic | Expert | Master |
| Badger’s Hat (defeat the Eye of Cthulhu within the day, 100%) | 8 Gold Coins (100%) | 8 Gold Coins (100%) |
| Healing Potion (five to 15 pieces, 100%) | Badger’s Hat (defeat the Eye of Cthulhu within the day, 100%) | Badger’s Hat (defeat the Eye of Cthulhu within the day, 100%) |
| Pwnhammer (100%) | Demon Heart (100%) | Demon Heart (100%) |
| Breaker Blade (25% (desktop, mobile, console) / 16.67% (3DS, old-gen consoles)) | Healing Potion (five to 15 pieces, 100%) | Healing Potion (five to 15 pieces, 100%) |
| Clockwork Assault Rifle (25% (desktop, mobile, console)) / 16.67% (3DS, old-gen consoles)) | Pwnhammer (100%) | Pwnhammer (100%) |
| Firecracker (25%) | Treasure Bag (100%) | Treasure Bag (100%) |
| Laser Rifle (25% (desktop, mobile, console)) / 16.67% (3DS, old-gen consoles)) | Breaker Blade (25%) | Wall of Flesh Relic (100%) |
| Ranger Emblem (25% (desktop, mobile, console)) / 16.67% (3DS, old-gen consoles)) | Clockwork Assault Rifle (25%) | Breaker Blade (25%) |
| Sorcerer Emblem (25% (desktop, mobile, console)) / 16.67% (3DS, old-gen consoles)) | Firecracker (25%) | Clockwork Assault Rifle (25%) |
| Summoner Emblem (25%) | Laser Rifle (25%) | Firecracker (25%) |
| Warrior Emblem (25% (desktop, mobile, console)) / 16.67% (3DS, old-gen consoles)) | Ranger Emblem (25%) | Goat Skull (25%) |
| Wall of Flesh Mask (14.29%) | Sorcerer Emblem (25%) | Laser Rifle (25%) |
| Wall of Flesh Trophy (10%) | Summoner Emblem (25%) | Ranger Emblem (25%) |
| Warrior Emblem (25%) | Sorcerer Emblem (25%) | |
| Wall of Flesh Mask (14.29%) | Summoner Emblem (25%) | |
| Warrior Emblem (25%) | ||
| Wall of Flesh Mask (14.29%) | ||
| Wall of Flesh Trophy (10%) |
Hardmode Bosses in Order
Queen Slime (optional)
| Health (Classic / Expert / Master) | Damage (Classic / Expert / Master) | Knockback Immunity | Defense |
| 18000 / 28800 / 36720 | Queen Slime have three unique attacks: Melee (60 / 120 / 180) Queenly Smash (80 / 160 / 240) Regal Gel (60 / 120 / 180) | 100% | 26 |
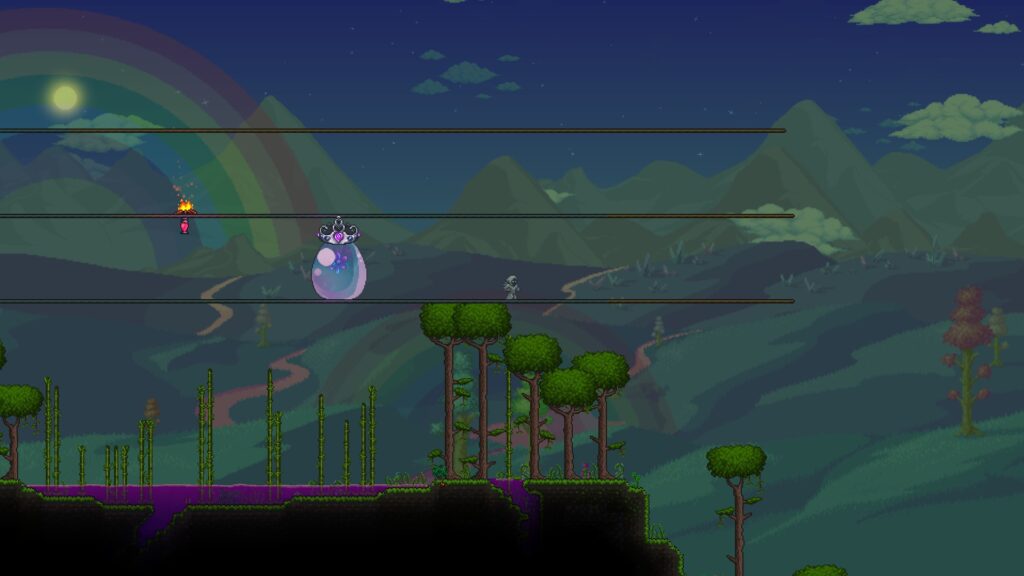
One of two Hallowed biome bosses you can fight in Terraria is the Queen Slime – a Hardmode counterpart to King Slime. This monster is optional, but we recommend it because of its decent drops.
For the platform, at least 350 blocks will do. The game-changing equipment you need is Wings for mobility. If you don’t have one, check our guide here.
Remember: Anything the Queen Slime spits must be disposed of as fast as possible. Failing to do so will overwhelm and eventually kill you. For advanced players, creating Teleporters can help, especially with the boss’ Flying ability.
Summoning the Queen Slime is solely done using the Gelatin Crystal you can find in the Underground Hallow biome.
Note: Inflicting Confused, Poisoned, and Shimmering debuff will do nothing.

| Classic | Expert | Master |
| Greater Healing Potion (five to 15 pieces, 100%) | 6 Gold Coins (100%) | 6 Gold Coins (100%) |
| Sparkle Slime Balloon (25 to 75 pieces, 100%) | Greater Healing Potion (five to 15 pieces, 100%) | Greater Healing Potion (five to 15 pieces, 100%) |
| Crystal Assassin Hood (33.33%) | Sparkle Slime Balloon (25 to 74 pieces, 100%) | Queen Slime Relic (100%) |
| Crystal Assassin Pants (33.33%) | Treasure Bag (100%) | Sparkle Slime Balloon (25 to 74 pieces, 100%) |
| Crystal Assassin Shirt (33.33%) | Volatile Gelatin (100%) | Treasure Bag (100%) |
| Hook of Dissonance (33.33%) | Crystal Assassin Hood (67%) | Volatile Gelatin (100%) |
| Blade Staff (25%) | Crystal Assassin Pants (67%) | Crystal Assassin Pants (67%) |
| Gelatinous Pillion (25%) | Crystal Assassin Shirt (67%) | Crystal Assassin Shirt (67%) |
| Queen Slime Mask (14.29%) | Gelatinous Pillion (50%) | Crystal Assasssin Hood (67%) |
| Queen Slime Trophy (10%) | Hook of Dissonance (50%) | Gelatinous Pillion (50%) |
| Blade Staff (33%) | Hook of Dissonance (50%) | |
| Queen Slime Mask (14.29%) | Blade Staff (33%) | |
| Queen Slime Trophy (10%) | Regal Delicacy (25%) | |
| Queen Slime Mask (14.29%) | ||
| Queen Slime Trophy (10%) |
The Destroyer

| Health (Classic / Expert / Master) | Damage (Classic / Expert / Master) | Knockback Immunity | Defense | |
| The Destroyer Head | 80000 / 120000/ 153000 | 70 / 280 / 420 | Total | 0 |
| The Destroyer Body | The Destroyer’s Body have two unique attacks: Melee (55 / 93 / 140) Death Laser (44 / 72 / 108) | |||
| The Destroyer Tail | 40 / 68 / 102 |
The Destroyer is one of three mechanical bosses in Terraria – and we consider it the easiest. Although the boss is a robotic version of its Pre-Hardmode counterpart, it now fires lasers.
There are two tricks we recommend if you’re fighting the Destroyer:
1. If your world has the Crimson biome, farm Crimson Mimics until you get the Fetid Baghnakhs. Afterward, go to the Tinkerer and get the best modifier possible (Red rarity). With a decent tankiness, summon the boss and claw your way to victory.
2. The Daedalus Stormbow is another excellent alternative. You can obtain the bow by farming Hallowed Mimics in Terraria. The weapon works by raining arrows from above, which makes aiming easier. Moreover, pairing it with Jester’s Arrow enables piercing, which is The Destroyer’s weakness.
To spawn The Destroyer in Terraria, you can either:
- Wait. There’s a 10% chance for the boss to spawn naturally once a Crimson Altar or Demon Altar is destroyed using the Pwnhammer. You’ll be informed before its arrival when the message “You feel vibrations from deep below…” pops up.
- Use the Mechanical Worm. You can synthesize one by bringing 5 Iron Bars or Lead Bars, 6 Souls of Night, and 6 Rotten Chunk or Vertebrae.
Note: It’s best not to consume any debuff-inflicting Potions or Flasks. Focus on adding raw damage and critical strike chance. The Destroyer is immune to all inflicted debuffs.

| Classic | Expert | Master |
| Soul of Might (25 to 40 pieces, 100%) | 12 Gold Coins (100%) | 12 Gold Coins (100%) |
| Hallowed Bar (15 to 30 pieces, 100%) | Greater Healing Potion (five to 15 pieces, 100%) | Destroyer Relic (100%) |
| Greater Healing Potion (five to 15 pieces, 100%) | Hallowed Bar (20 to 35 pieces, 100%) | Greater Healing Potion (five to 15 pieces, 100%) |
| Destroyer Mask (14.29%) | Mechanical Wagon Piece (100%) | Mechanical Wagon Piece (100%) |
| Destroyer Trophy (10%) | Soul of Might (25 to 40 pieces, 100%) | Soul of Might (25 to 40 pieces, 100%) |
| Soul of Might (25 to 40 pieces, 100%) | Treasure Bag (100%) | Hallowed Bar (20 to 35 pieces, 100%) |
| Destroyer Mask (14.29%) | Treasure Bag (100%) | |
| Destroyer Trophy (10%) | Deactivated Probe (25%) | |
| Destroyer Mask (14.29%) | ||
| Destroyer Trophy (10%) |
The Twins

| Health (Classic / Expert / Master) | Damage (Classic / Expert / Master) | Knockback Immunity | Defense | |
| Retinazer | 20000 / 30000 / 38250 | First form: Contact (45 / 76 / 114) Eye Laser (40 / 76 / 114) Second form: Contact (67 / 114 / 171) Death Laser (50 / 92 / 138) Rapid Fire (36 / 68 / 102) | Total | First form (10) Second form (20) |
| Spazmatism | 23000 / 34500 / 43987 | First form: Contact (50 / 85 / 127) Cursed Flame (50 / 88 / 132) Second form: Contact (75 / 127 / 190) Eye Fire (60 / 108 / 162) | First form (10) Second form (28) |
After The Destroyer, next on your hitlist is The Twins. This pair of eyeballs have varying attacks – from Cursed Inferno debuffs inflicted by Spazmatism to laser burst the Retinazer spews. In combination, they’re deadly and overwhelming, especially in their second phase.
For melee users, you have a lot of disadvantages fighting The Twins. Both eyes stay far from you while kiting damage, which is horrible. But you’ll have better winning odds when using Ranged or Magic weapons.
For the arena, please don’t forget to make it long enough to run for 15 seconds with a mount on. Much chasing will happen, especially in the bosses’ second phase. Spazmatism’s Cursed Inferno debuff is more lethal than lasers, so make sure to have high mobility.
We recommend defeating Spaz first before Rez. Although, feel free to rain hell on both of them.
To summon the Twins, you can either:
- Wait. After destroying a Demon Altar or Crimson Altar using the Pwnhammer, there’s a 10% chance for the boss in Terraria to spawn. Get ready to battle after receiving the message, “This is going to be a terrible night…” popped up below.
- Use the Mechanical Eye. The materials for making this item are 3 Lenses, 5 Iron Bars or Lead Bars, and Souls of Light. Make sure to have a Mythril Anvil or an Orichalcum Anvil lying around.
Note: The Twins are immune to Poisoned and Confused debuffs.

| Classic | Expert | Master |
| Greater Healing Potion (five to 15 pieces, 100%) | 12 Gold Coins (100%) | 12 Gold Coins (100%) |
| Hallowed Bar (15 to 30 pieces, 100%) | Greater Healing Potion (five to 15 pieces, 100%) | Greater Healing Potion (five to 15 pieces, 100%) |
| Soul of Sight (25 to 40 pieces, 100%) | Hallowed Bar (20 to 35 pieces, 100%) | Hallowed Bar (20 to 35 pieces, 100%) |
| Twin Mask (14.29%) | Mechanical Wheel Piece (100%) | Mechanical Wheel Piece (100%) |
| Retinazer Trophy (10%) | Soul of Sight (25 to 40 pieces, 100%) | Soul of Sight (25 to 40 pieces, 100%) |
| Spazmatism Trophy (10%) | Treasure Bag (100%) | Treasure Bag (100%) |
| Twin Mask (14.29%) | Twins Relic (100%) | |
| Retinazer Trophy (10%) | Pair of Eyeballs (25%) | |
| Spazmatism Trophy (10%) | Twin Mask (14.29%) | |
| Retinazer Trophy (10%) | ||
| Spazmatism Trophy (10%) |
Skeletron Prime
| Health (Classic / Expert / Master) | Damage (Classic / Expert / Master) | Knockback Immunity | Defense | |
| Skeletron Prime Head | 28000 / 42000 / 53550 | Stationary: 47 / 79 / 119 Spinning: 94 / 158 / 238 | Total | Stationary: 24 Spinning: 48 |
| Prime Cannon | 7000 / 10500 / 13387 | Melee (30 / 51 / 76) Bomb (80 / 160 / 240) | 23 | |
| Prime Saw | 9000 / 13500 / 17212 | 56 / 92 / 142 | 38 | |
| Prime Vice | 9000 / 13500 / 17212 | 52 / 88 / 132 | 34 | |
| Prime Laser | 6000 / 9000 / 11475 | Melee (29 / 49 / 73) Death Laser (50 / 100 / 150) | 20 |
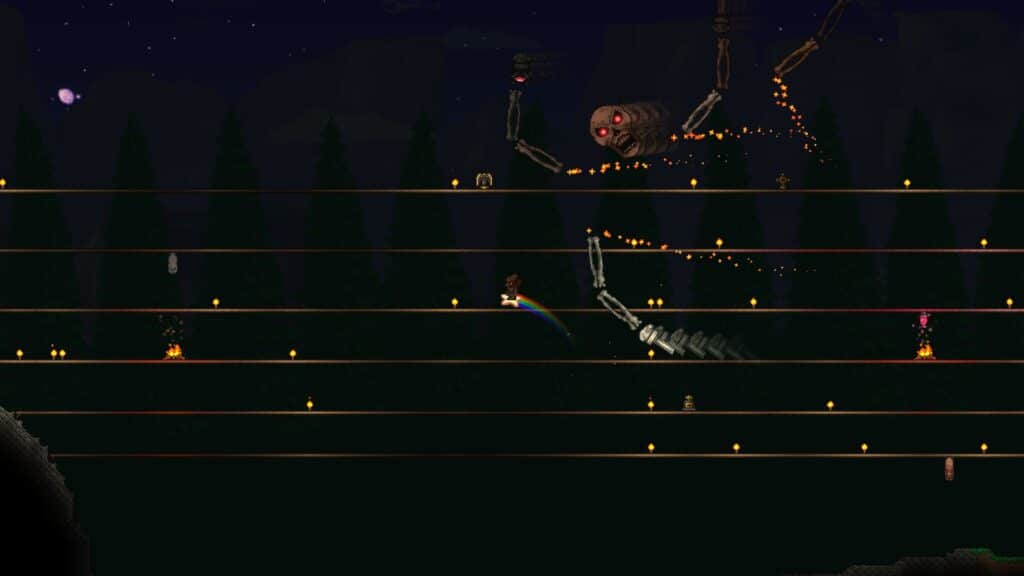
Unlike the first two mechanical bosses, the Skeletron Prime is less lethal, even if you’re bad at dodging. The caveat is that he’ll chase you, hence the need for a larger arena platform. You may expand an existing one you used when battling the Skeletron from Pre-Hardmode.
You can defeat the Skeletron Prime in many ways, but our two favorites involve playing safe and risky.
The first option requires you to use a Ranged or Magic weapon. For the armor, you can wear one that balances damage and defense – or even hybridize. The combat should focus on blasting Prime Cannon and Prime Laser, as they’ll hit you often. Then, you can follow up by destroying the rest of Skeletron Prime.
The second option is straightforward and similar to the run-and-gun concept. In this case, you’ll need a weapon that offers solid DPS, like Fetid Baghnakhs. Titanium and Hallowed armor sets are your best picks here, with the former offering protection and the latter the dodge ability.
To spawn the Skeletron Prime, you can either:
- Wait. There’s a 10% chance it’ll appear at night after destroying Altars.
- Use the Mechanical Skull. Crafting requires 3 Souls of Light and Souls of Night, 5 Iron Bars or Lead Bars, and 30 Bones. Mythril Anvil and Orichalcum Anvil are needed crafting stations.
Note: The Skeletron Prime has immunity to Confused, Poisoned, Blood Butchered, Penetrated, and Distorted debuffs.

| Classic | Expert | Master |
| Greater Healing Potion (five to 15 pieces, 100%) | 12 Gold Coins (100%) | 12 Gold Coins (100%) |
| Hallowed Bar (15 to 30 pieces, 100%) | Greater Healing Potion (five to 15 pieces, 100%) | Greater Healing Potion (five to 15 pieces, 100%) |
| Soul of Fright (25 to 40 pieces, 100%) | Hallowed Bar (20 to 35 pieces, 100%) | Hallowed Bar (20 to 35 pieces, 100%) |
| Skeletron Prime Mask (14.29%) | Mechanical Battery Piece (100%) | Mechanical Battery Piece (100%) |
| Skeletron Prime Trophy (10%) | Soul of Fright (25 to 40 pieces, 100%) | Skeletron Prime Relic (100%) |
| Treasure Bag (100%) | Soul of Fright (25 to 40 pieces, 100%) | |
| Skeletron Prime Mask (14.29%) | Treasure Bag (100%) | |
| Skeletron Prime Trophy (10%) | Robotic Skull (25%) | |
| Skeletron Prime Mask (14.29%) | ||
| Skeletron Prime Trophy (10%) |
Plantera
| Health (Classic / Expert / Master) | Damage (Classic / Expert / Master) | Knockback Immunity | Defense |
| 30000 / 42000 / 53550 | Plantera’s first form have four unique attacks: Contact (50 / 100 / 150) Seed (44 / 76 / 114) Poison Seed (54 / 96 / 144) Thorn Ball (62 / 108 / 162) Second form (70 / 140 / 210 (Contact only)) | Total | 36 (first form) / 10 (second form) |
Getting the Plantera to spawn in Terraria is tricky if you don’t have horizontal tunnels. But it makes a world of difference if you have one.
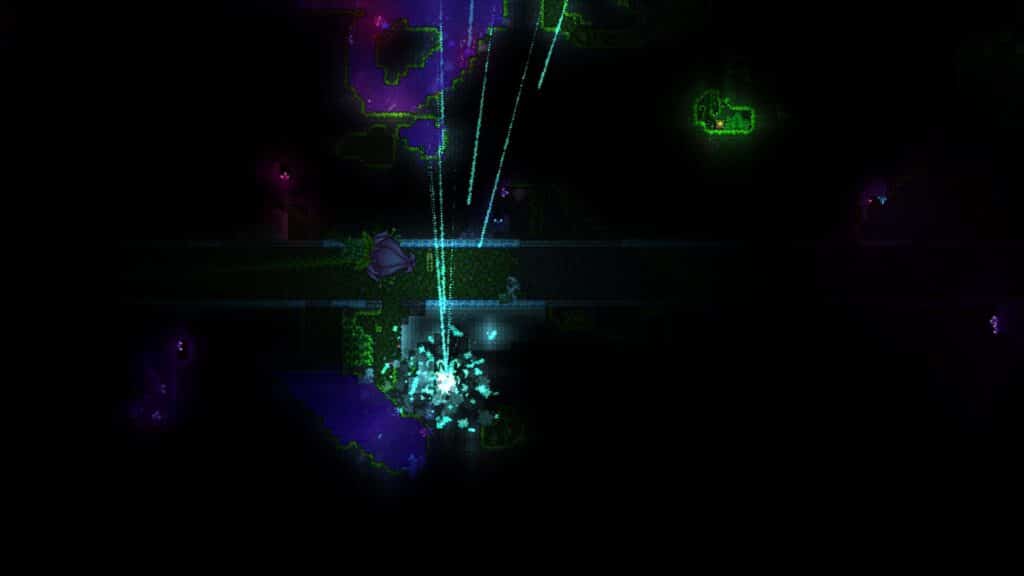
Destroying Plantera’s Bulbs is a surefire way to spawn Plantera. You can find them randomly scattered in the Underground Jungle. Don’t pop them yet because you must create an arena first!
You’ll find large openings in the Underground Jungle if you’re lucky. It’s even better if a Bulb is nearby. The same procedures: the arena should be wide enough to move, or you can use your tunnels if things get desperate.
Alternatively, you can exploit Plantera’s behavior by making Teleporters. The idea is simple: Plantera will move slowly to you, with less chance of inflicting damage. As a Ranged or Magic user, position yourself safely and hit the Lever to teleport to the side. In the process, you should be dealing damage.
Note: Confused and Poisoned debuffs will have no effect on Plantera.

| Classic | Expert | Master |
| Flower Pow (14.29% (desktop, mobile, console) / 16.67% (3DS, old-gen consoles)) | 15 Gold Coins (100%) | 15 Gold Coins (100%) |
| Greater Healing Potion (five to 15 pieces, 100%) | Greater Healing Potion (five to 15 pieces, 100%) | Greater Healing Potion (five to 15 pieces, 100%) |
| Temple Key (100%) | Flower Pow (14.29%) | Plantera Relic (100%) |
| Pygmy Staff (25%) | Spore Sac (100%) | Spore Sac (100%) |
| Grenade Launcher & Rocket I (50 to 149 pieces (desktop, mobile, console) / 20 to 49 pieces (3DS, old-gen consoles), 100% if it’s your first time defeating Plantera in a non-Expert & Master worlds. Otherwise, 14.29% (desktop, mobile, console) / 16.67% (3DS, old-gen consoles)) | Temple Key (100%) | Temple Key (100%) |
| Leaf Blower (14.29% (desktop, mobile, console) / 16.67% (3DS, old-gen consoles)) | Treasure Bag (100%) | Treasure Bag (100%) |
| Nettle Burst (14.29% (desktop, mobile, console) / 16.67% (3DS, old-gen consoles)) | Pygmy Staff (50%) | Pygmy Staff (50%) |
| Plantera Mask (14.29%) | Grenade Launcher & Rocket I (50 to 149 pieces, 14.29%) | Plantera Seedling (25%) |
| Seedler (14.29%) | Leaf Blower (14.29%) | Flower Pow (14.29%) |
| Venus Magnum (14.29% (desktop, mobile, console) / 16.67% (3DS, old-gen consoles)) | Nettle Burst (14.29%) | Grenade Launcher & Rocket I (50 to 149 pieces, 14.29%) |
| Wasp Gun (14.29% (desktop, mobile, console) / 16.67% (3DS, old-gen consoles)) | Plantera Mask (14.29%) | Leaf Blower (14.29%) |
| Plantera Trophy (10%) | Seedler (14.29%) | Nettle Burst (14.29%) |
| Thorn Hook (10%) | Venus Magnum (14.29%) | Plantera Mask (14.29%) |
| Seedling (5%) | Wasp Gun (14.29%) | Seedler (14.29%) |
| The Axe (2% (desktop, mobile, console) / 0.5% (3DS, old-gen consoles)) | Plantera Trophy (10%) | Venus Magnum (14.29%) |
| Thorn Hook (10%) | Wasp Gun (14.29%) | |
| Seedling (6.67%) | Plantera Trophy (10%) | |
| The Axe (5%) | Thorn Hook (10%) | |
| Seedling (6.67%) | ||
| The Axe (5%) |
Golem

| Health (Classic / Expert / Master) | Damage (Classic / Expert / Master) | Knockback Immunity | Defense | |
| Golem Head | 25000 (desktop, mobile, console) / 16000 (3DS, old-gen consoles) / 37500 / 47812 | Golem Head First form: Contact (64 / 102 / 153) Fireball (36 to 58 / 72 to 116 / 108 to 174 (health-dependent) Eye Beam (56 / 112 / 168) Golem Head second form (Freed): Contact (80 / 128 / 192) | Total | 20 (intact) / 32 (freed) |
| Golem Body (available on second form) | 15000 (desktop, mobile, console) / 9000 (3DS, old-gen consoles) / 22500 / 28687 | Contact (72 / 115 / 172) | 26 | |
| Golem Fists | 10000 (desktop, mobile, console) / 7000 (3DS, old-gen consoles) (each fist) / 15000 (each fist) / 19125 (each fist) | Contact (59 / 94 / 141) | 28 | |
| Total | 60000 (desktop, mobile, console) / 39000 (3DS, old-gen consoles) / 90000 / 114749 |
Many Terraria players know that the Golem is the easiest Hardmode boss you can farm for Coins. Plus, almost every Lihzahrd you’ll encounter in the Temple will drop the boss-summoning item, Lihzahrd Power Cell.
If you don’t know where to find a Lihzahrd Temple, we recommend digging down consistently. You may use Bombs to aid your search. If you’re lucky to have horizontal tunnels, even better. Traversing the inside can also be dangerous, so we recommend equipping a tanky armor set with good regenerative capabilities.
Once you’ve located the bottom of the structure, you’ll find an Altar. But don’t summon the boss yet. Preparing an arena with climbable blocks is best to dodge the Golem’s attacks.
If you’re happy with the setup, interact with the Lihzahrd Altar while holding the Lihzahrd Power Cell to spawn the Golem. The boss’ attacks are predictable after a while, and you should have less difficulty defeating it.
Note: The Golem has resistance to On Fire!, Confused, and Poisoned debuffs.

| Classic | Expert | Master |
| Beetle Husk (four to eight pieces, 100%) | 12 Gold Coins (100%) | Beetle Husk (18 to 23 pieces, 100%) |
| Greater Healing Potion (five to 15 pieces, 100%) | Beetle Husk (18 to 23 pieces, 100%) | 12 Gold Coins (100%) |
| Picksaw (25% (desktop, mobile, console) / 12.5% (3DS, old-gen consoles)) | Treasure Bag (100%) | Golem Relic (100%) |
| Eye of the Golem (14.29% (desktop, mobile, console) / 12.5% (3DS, old-gen consoles)) | Greater Healing Potion (five to 15 pieces, 100%) | Greater Healing Potion (five to 15 pieces, 100%) |
| Golem Fist (14.29% (desktop, mobile, console) / 12.5% (3DS, old-gen consoles)) | Shiny Stone (100%) | Shiny Stone (100%) |
| Golem Mask (14.29%) | Picksaw (33.33%) | Treasure Bag (100%) |
| Heat Ray (14.29% (desktop, mobile, console) / 12.5% (3DS, old-gen consoles)) | Eye of the Golem (14.29%) | Picksaw (33.33%) |
| Possessed Hatchet (14.29% (desktop, mobile, console) / 12.5% (3DS, old-gen consoles)) | Golem Fist (14.29%) | Guardian Golem (25%) |
| Staff of Earth (14.29% (desktop, mobile, console) / 12.5% (3DS, old-gen consoles)) | Golem Mask (14.29%) | Eye of the Golem (14.29%) |
| Stynger & Stynger Bolt (60 to 99 pieces, 14.29% (desktop, mobile, console) / 12.5% (3DS, old-gen consoles)) | Heat Ray (14.29%) | Golem Fist (14.29%) |
| Sun Stone (14.29% (desktop, mobile, console) / 12.5% (3DS, old-gen consoles)) | Stynger & Stynger Bolt (60 to 99 pieces, 14.29%) | Golem Mask (14.29%) |
| Golem Trophy (10%) | Possessed Hatchet (14.29%) | Heat Ray (14.29%) |
| Staff of Earth (14.29%) | Possessed Hatchet (14.29%) | |
| Sun Stone (14.29%) | Staff of Earth (14.29%) | |
| Golem Trophy (10%) | Stynger & Stynger Bolt (60 to 99 pieces, 14.29%) | |
| Sun Stone (14.29%) | ||
| Golem Trophy (10%) |
Empress of Light (optional)

| Health (Classic / Expert / Master) | Damage (Classic / Expert / Master) | Knockback Immunity | Defense |
| 70000 / 98000 / 124960 | Being a unique optional boss, the Empress of Light have six unique attack patterns: First form: Melee (80 / 110 / 165 – applicable to second form) Dash (120 / 165 / 248 – applicable to second form) Prismatic Bolt (90 / 120 / 180) Sun Dance (100 / 140 / 210) Everlasting Rainbow (90 / 120 / 180) Ethereal Lance (100 / 120 / 180) Second form: Prismatic Bolt (100 / 140 / 210) Sun Dance (120 / 160 / 240) Everlasting Rainbow (100 / 140 / 210) Ethereal Lance (120 / 140 / 210) Ethereal Lance II (130 / 120 / 180) | Total | First form (50) Second form (60) |
The Empress of Light is the final Hallowed boss you’ll encounter alongside Queen Slime. Defeating her is extremely rewarding but also challenging to fight. The boss’ drops are good, especially the Terraprisma, adding a significant amount of DPS. However, you need to kill the Empress of Light in the daytime.
The daytime Empress of Light can kill you in one shot, so you can skip that part if you’re a beginner. Still, Eventide and Kaleidoscope are good weapons for your arsenal before fighting the Lunatic Cultist and Moon Lord.
Melee weapons are a no-go when dealing with this boss. Almost all her attacks are ranged, which means you’ll get fewer hits (unless your melee weapon has projectiles). Ranged and Magic weapons will do just fine, but remember, you’ll need high mechanical skills!
An arena with at least 400 blocks per row will serve as your base. Afterward, you can repeat that three to four times with at least a 30-block gap. Your equipment must include high regeneration properties and a decent mix of tankiness. Of course, you can max out DPS if you’re confident dodging her attacks. You might get killed here and there, but practice makes perfect!
During the fight, the Empress of Light releases chasing projectiles, charges aggressively, and emits light beams with little space to take cover. But that’s where your Wings and Mounts come into play.
To spawn the Empress of Light, kill a Prismatic Lacewing you can find in the Hallowed biome.
Note: The Empress of Light’s only debuff immunity is Confused. Other DPS-inducing items will help you defeat this Terraria boss.

| Classic | Expert | Master |
| Greater Healing Potion (five to 15 pieces, 100%) | 25 Gold Coins (100%) | 25 Gold Coins (100%) |
| Terraprisma (from enraged Empress of Light, 100%) | Greater Healing Potion (five to 15 pieces, 100%) | Empress of Light Relic (100%) |
| Eventide (25%) | Soaring Insignia (100%) | Greater Healing Potion (five to 15 pieces, 100%) |
| Kaleidoscope (25%) | Terraprisma (from enraged Empress of Light, 100%) | Soaring Insignia (100%) |
| Nightglow (25%) | Treasure Bag (100%) | Terraprisma (from enraged Empress of Light, 100%) |
| Prismatic Dye (25%) | Eventide (25%) | Treasure Bag (100%) |
| Starlight (25%) | Kaleidoscope (25%) | Eventide (25%) |
| Empress of Light Mask (14.29%) | Nightglow (25%) | Jewel of Light (25%) |
| Empress of Light Trophy (10%) | Prismatic Dye (25%) | Kaleidoscope (25%) |
| Empress Wings (6.67%) | Starlight (25%) | Nightglow (25%) |
| Rainbow Cursor (5%) | Empress of Light Mask (14.29%) | Prismatic Dye (25%) |
| Stellar Tune (2%) | Empress of Light Trophy (10%) | Starlight (25%) |
| Empress Wings (10%) | Empress of Light Mask (14.29%) | |
| Rainbow Cursor (5%) | Empress of Light Trophy (10%) | |
| Stellar Tune (5%) | Empress Wings (10%) | |
| Rainbow Cursor (5%) | ||
| Stellar Tune (5%) |
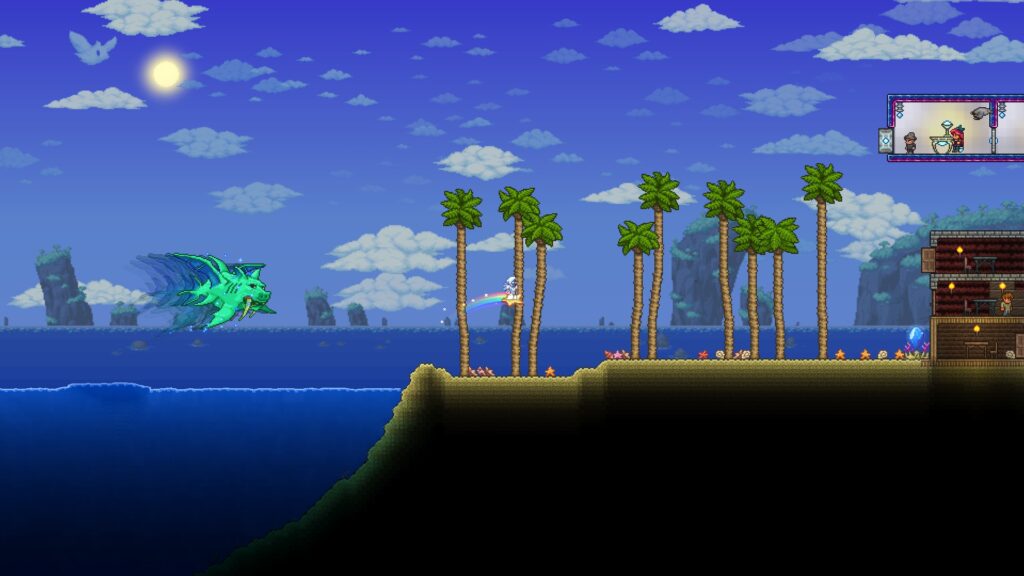
Duke Fishron (optional)
| Health (Classic / Expert / Master) | Damage (Classic / Expert / Master) | Knockback Immunity | Defense |
| 60000 (desktop, mobile, console) / 50000 (3DS, old-gen consoles) / 78000 / 99450 | Duke Fishron have three unique attacks: First form: Contact (100 / 140 / 210) Contact if enraged (200 / 280 / 420) Sharknado (80 / 100 / 150) Detonating Bubble (100 / 150 / 225) Second form: Contact (2nd stage) (120 / 201 / 302) Contact (3rd stage) (n/a / 184 / 277) Contact if enraged (200 / 280 / 420) Cthulunado (160 / 200 / 300) | Total | First form: 50 (100 if enraged) Second form: 40 (100 if enraged) |
Duke Fishron may have less health than other Hardmode bosses in Terraria, but he compensates by putting up a good fight. Post-Golem, you’ll have good weapons to obtain, including those from the Martian Madness event. But if you’re hybridizing magic and summoner damage, you may want to get loot from fighting this boss.
Our favorite tactic against Duke Fishron is similar to Plantera’s setup. You’ll need to make the same arena with Teleporters while encased in a safe space. The Megashark is a good gun we recommend, although your bullets better be Chlorophyte to aid in aiming. Combine that with Flasks and Potions, and you’re good to go.
Spawning Duke Fishron is easy. Go to the Ocean biome and use the Truffle Worm as bait. Cast your Fishing Pole, reel in, and you’ll find yourself in a fight. To catch the Truffle Worm, go to the Glowing Mushroom biome and use Bug Nets.
Note: Some Flasks with good damage over time effects will help since Duke Fishron is only immune to Confused and Stunned debuffs (first phase). During phase two, he’ll no longer receive damage from Poisoned, Acid Venom, On Fire!, and Frostburn.

| Classic | Expert | Master |
| Greater Healing Potion (five to 15 pieces, 100%) | 25 Gold Coins (100%) | 25 Gold Coins (100%) |
| Bubble Gun (20%) | Greater Healing Potion (five to 15 pieces, 100%) | Duke Fishron Relic (100%) |
| Flairon (20%) | Shrimpy Truffle (100%) | Greater Healing Potion (five to 15 pieces, 100%) |
| Razorblade Typhoon (20%) | Treasure Bag (100%) | Shrimpy Truffle (100%) |
| Tempest Staff (20%) | Bubble Gun (20%) | Treasure Bag (100%) |
| Tsunami (20%) | Flairon (20%) | Pork of the Sea (25%) |
| Duke Fishron Mask (14.29%) | Razorblade Typhoon (20%) | Bubble Gun (20%) |
| Duke Fishron Trophy (10%) | Tempest Staff (20%) | Flairon (20%) |
| Fishron Wings (6.67%) | Tsunami (20%) | Razorblade Typhoon (20%) |
| Greater Healing Potion (five to 15 pieces, 100%) | Duke Fishron Trophy (14.29%) | Tempest Staff (20%) |
| Duke Fishron Trophy (10%) | Tsunami (20%) | |
| Fishron Wings (10%) | Duke Fishron Mask (14.29%) | |
| Duke Fishron Trophy (10%) | ||
| Fishron Wings (10%) |
Lunatic Cultist

| Health (Classic / Expert / Master) | Damage (Classic / Expert / Master) | Knockback Immunity | Defense |
| 32000 / 48000 / 61000 | The Lunatic Cultist have eight unique attacks: Contact (50 / 75 / 112) Shadow Fireball (36 / 72 / 72) Ice Mist (70 / 100 / 100) Fireball (60 / 80 / 80) Lightning Orb (90 / 120 / 120) Ancient Light (120 / 160 / 160) Ancient Doom (30 / 45 / 67) Prophecy’s End (60 / 180 / 402) | Total | 42 (27 if health is equal or less than 50%) |
The Lunatic Cultist is technically a mini-boss because of its easy difficulty. However, triggering the Celestial Pillar events is an important step, then Moon Lord.
Your armor set and weapons are as good as it is from your Golem fight. The same arena from your Skeletron and Skeletron Prime are also viable.
To spawn the Lunatic Cultist, you must kill all Cultists in the surface Dungeon.
Note: The Lunatic Cultist is immune to On Fire! Debuff. This means you can inflict him debuffs that deal damage over time. There’s no turning back once you’ve defeated this boss in Terraria. Consider all preparations for the final battle.

| Classic | Expert | Master |
| Ancient Manipulator (100%) | Ancient Manipulator (100%) | Ancient Manipulator (100%) |
| Greater Healing Potion (five to 15 pieces, 100%) | Greater Healing Potion (five to 15 pieces, 100%) | Greater Healing Potion (five to 15 pieces, 100%) |
| Lunatic Cultist Mask (14.29%) Lunatic Cultist Trophy (10%) | Lunatic Cultist Mask (14.29%) | Lunatic Cultist Relic (100%) |
| Ancient Manipulator (100%) | Lunatic Cultist Trophy (10%) | Tablet Fragment (25%) |
| Ancient Manipulator (100%) | Lunatic Cultist Mask (14.29%) | |
| Lunatic Cultist Trophy (10%) |
Moon Lord

| Health (Classic / Expert / Master) | Damage (Classic / Expert / Master) | Knockback Immunity | Defense | |
| Moon Lord Head | 45000 / 67500 / 86062 | No contact damage. But this part have two attacks: Phantasmal Deathray (150 / 300 / 450) Phantasmal Bolt (60 / 120 / 180) | Total | 50 |
| Moon Lord’s Hand | 25000 / 37500 / 47812 | No contact damage, unless it’s the Open Eye Socket (80). Moreover, this part have three attacks: Phantasmal Sphere (80 / 160 / 240) Phantasmal Eye (60 / 120 / 180) Phantasmal Bolt (60 / 120 / 180) | 60 | |
| Moon Lord’s Core | 50000 / 75000 / 95625 | None | 70 | |
| Total | 145000 |
After defeating all Celestial Pillars, the Moon Lord will spawn after sixty seconds. However, you may also summon him using a Celestial Sigil made from 12 Solar Fragment, Vortex Fragment, Nebula Fragment, and Stardust Fragment at an Ancient Manipulator.
We recommend using your current best armor from the previous tips above. This ranges from Spectre armor (hood build), Turtle armor, or Valhalla Knight armor.
The most important factor for survivability is dodging the Moon Lord’s attacks by moving a lot. You may die a few times, but you’ll defeat him eventually.
Note: The Moon Lord is immune to Confused and Shimmering debuffs. You may add damage over time to the final boss in Terraria. However, be careful with its Moon Bite debuff, which prevents health regeneration.

| Classic | Expert | Master |
| Luminite (70 to 90 pieces, 100%) | Celestial Starboard (100%) | Celestial Starboard (100%) |
| Portal Gun (100%) | Gravity Globe (100%) | Gravity Globe (100%) |
| Super Healing Potion (five to 15 pieces, 100%) | Luminite (90 to 110 pieces, 100%) | Luminite (90 to 110 pieces, 100%) |
| Celebration Mk2 (22.2%) | Portal Gun (100%) | Moon Lord Relic (100%) |
| Last Prism (22.2%) | Super Healing Potion (five to 15 pieces, 100%) | Portal Gun (100%) |
| Meowmere (22.2%) | Suspicious Looking Tentacle (100%) | Super Healing Potion (five to 15 pieces, 100%) |
| Lunar Flare (22.2%) | Treasure Bag (100%) | Suspicious Looking Tentacle (100%) |
| Lunar Portal Staff (22.2%) | Celebration Mk2 (22.2%) | Treasure Bag (100%) |
| Rainbow Crystal Staff (22.2%) | Last Prism (22.2%) | Piece of Moon Squid (25%) |
| S.D.M.G. (22.2%) | Lunar Flare (22.2%) | Celebration Mk2 (22.2%) |
| Star Wrath (22.2%) | Lunar Portal Staff (22.2%) | Last Prism (22.2%) |
| Terrarian (22.2%) | Meowmere (22.2%) | Lunar Flare (22.2%) |
| Moon Lord Mask (14.29%) | Rainbow Crystal Staff (22.2%) | Lunar Portal Staff (22.2%) |
| Meowmere Minecart (10%) | S.D.M.G. (22.2%) | Meowmere (22.2%) |
| Moon Lord Trophy (10%) | Star Wrath (22.2%) | Rainbow Crystal Staff (22.2%) |
| Terrarian (22.2%) | S.D.M.G. (22.2%) | |
| Moon Lord Mask (14.29%) | Star Wrath (22.2%) | |
| Meowmere Minecart (10%) | Terrarian (22.2%) | |
| Moon Lord Trophy (10%) | Moon Lord Mask (14.29%) | |
| Meowmere Minecart (10%) | ||
| Moon Lord Trophy (10%) |
Conclusion
If you’ve reached this stage, congratulations! There are many things to do in Terraria besides defeating all bosses from Pre-Hardmode to Hardmode. There are more challenges like Frost Moon and Pumpkin Moon events or completing cutting off evil biomes in your world.
