The best mounts in Terraria can make your life much easier. These creatures and objects allow you to travel fast and combat enemies. Like in other games, a player is instantly placed on a mount when you summon it. There are 26 of them, and you can dye them for some extra customization.
The fantastic thing about Terraria is that you can use weapons and tools while riding one of these creatures. In other words, you’ll benefit from the movement speed and can still drill deep into the ground and perform various tasks.
12 Best mounts in Terraria
In this article, we’ve reviewed the top 12 mounts in the game. Aside from their stats, we also considered their acquisition method and how quickly you can get them. The list includes Classic and Master Mode items classified from worst to best.
12. Santank (Toy Tank)
Santank basic stats:
| Requires | Santa-NK1 drop (only on Master mode) |
| Height | 12 |
| Speed | 41 |
| Effects | Automatically shoots at opponents The player takes 1 fall damage Provides double-jump |
Santank is one of the best items you can get during the Frost Moon event. Although it’s a high-tier accessory, it doesn’t provide much in terms of jumping and mobility. Its speed is average, and the double jump isn’t anything special. To make matters worse, it only drops on Master mode.
However, we love the fact it automatically shoots at enemies, providing extra firepower to the player.
11. Bunny (Fuzzy Carrot)
Bunny basic stats:
| Requires | Angler reward after finishing five quests |
| Height | 12 |
| Speed | 39 |
| Effects | Enhanced jump The player takes no fall damage Gradually increases speed when running |
The reason why we’ve added this item is how easy it is to obtain. You just need to finish five easy Angler quests, and you’ll get it straight away. In fact, there is a good chance that Bunny will be the first item that you acquire from this category.
It’s really fast for early pre-Harmode. It also helps that you won’t have to worry about fall damage. This would give you some leeway with your accessory choices early on.
10. Bee (Honeyed Goggles)
Bee basic stats:
| Requires | Queen Bee drop |
| Height | 654 |
| Speed | 10 when walking 31 when flying |
| Effects | Noticeably slower when walking Provides limited, fast flight and auto-hover The player takes no fall damage Dismounts in liquids |
Bee is a creature that allows you to fly around during pre-Hardmode. In fact, it might be the best mount during this phase of the game. However, it’s much slower on land, and dismounts in liquids, which can be quite annoying.
There’s a 5% chance for Honeyed Goggles to drop from Queen Bee. So, grinding the item can be a bit arduous. We suggest that you use it with Cloud in the Bottle so you can fly around for a bit longer.
9. Goat (Goat Skull)
Goat basic stats:
| Requires | Wall of Flesh drop (only on Master mode) |
| Height | 39 |
| Speed | 61 |
| Effects | Fast running speed Provides double-jump Running through an opponent causes summon damage (at full speed) The player takes 80% less fall damage |
The main issue with this item is that you can only get it on Master mode. However, it’s fairly common having a 25% chance to drop from Wall of Flesh.
Goat gives you the ability to double-jump at a fairly decent height. It significantly reduces a player’s fall damage while damaging opponents when you run through them. All in all, it’s a decent pickup that you can get fairly early in the game. The mount will definitely make your life easier during a grueling Master playthrough.
8. Basilisk (Ancient Horn)
Basilisk basic stats:
| Requires | Basilisk |
| Height | 28 |
| Speed | 41 |
| Effects | Fast running speed and acceleration Enhanced jump Provides double-jump Running through an opponent causes summon damage The player takes 80% less fall damage |
Ancient Horn drops at a 2% rate, meaning that you’ll have to combat Basilisk 50 times until you get this object. The only saving grace is that the opponent is relatively common.
Basilisk has a nice running speed and acceleration. It allows you to run through enemies, making it easier to get from one part of the map to the other. You gain access to the double jump and the improved jump while riding the creature. Although this isn’t as good as having flight, it helps a lot during early Hardmode.
7. Unicorn (Blessed Apple)
Unicorn basic stats:
| Requires | Unicorn |
| Height | 39 |
| Speed | 61 |
| Effects | Fast running speed Provides double-jump Running through an opponent causes summon damage (at full speed) The player takes 80% less fall damage |
Unicorn is a replica of Goat. The only difference between the two is the acquisition method.
To get the mount, you need to kill numerous Unicorns (2.5% drop rate), which inhabit Hallow biome on Hardmode. However, there’s a cool trick that would allow you to get the item much sooner. Basically, you can use Unicorn statue pre-Hardmode to spawn these enemies.
After grinding Unicorns for a bit, you’ll get a fantastic mount that you’ll use late into the Hardmode.
6. Scutlix (Brain Scrambler)
Scutlix basic stats:
| Requires | Scutlix Gunner |
| Height | 40 |
| Speed | 41 |
| Effects | Fast running speed Automatically shoots at opponents The player takes 1 fall damage |
Scutlix is a mount that you can acquire during the Martian Madness event. It has the same stats as Santank, making it a fantastic choice for players who like to run and gun. Unfortunately, it doesn’t offer much in terms of flying, and there’s a good chance you’ll replace it relatively soon.
5. Witch’s Broom (Witch’s Broom)
Witch’s Broom basic stats:
| Requires | Mourning Wood (only on Expert mode) |
| Height | Infinite |
| Speed | 46 (horizontal speed) 41 (vertical speed) 62 (diagonal speed) |
| Effects | Infinite flight Very small Can’t descent through specific platforms |
Witch’s Broom has a few incredible features. Unlike other mounts, it doesn’t change the size of your character. You remain three tiles high, which is the player’s original size, allowing you to maneuver through tight mine shafts.
It is the first item on this list that provides unlimited flight. This is a fantastic feature that only a few mounts have and something you should prioritize when looking for a transportation method.
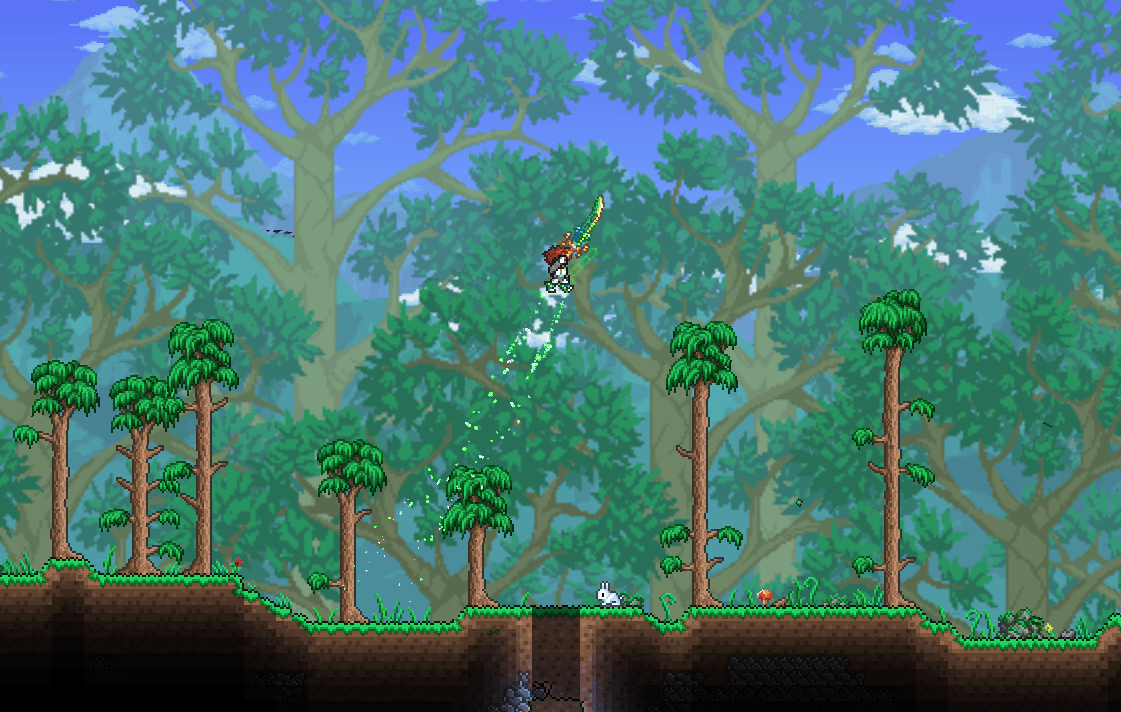
4. Tree (Hexxed Branch)
Tree basic stats:
| Requires | Mourning Wood (only on Master mode) |
| Height | N/A |
| Speed | 81 |
| Effects | Extremely fast running speed Running through an opponent causes summon damage (at full speed) |
Tree has the fastest running speed on land out of all the mounts. You can use this summon to quickly go from one end of the map to the next, making it an excellent choice for large worlds. Even better, you’ll damage all the enemies on your path, so you don’t have to worry about a collision.
Unfortunately, there are a few problems with this summon. First off, it’s only available on Master mode, as a drop from Mourning Wood. The same monster also gives Witch’s Broom, which is a more versatile item. Nevertheless, we decided to put it as 4th best mount as there’s simply nothing faster in the game.
3. UFO (Cosmic Car Key)
UFO basic stats:
| Requires | Martian Saucer |
| Height | Infinite |
| Speed | 41 (vertical and horizontal speed) 58 (diagonal speed) |
| Effects | Infinite flight Dismounts in liquids |
UFO is an easy-to-obtain item. It has a 16% chance of dropping from Martian Saucer, which means you should get it after playing the Martian Madness event six times. Given that you’ll likely participate in the event several times before finishing the game, you should get the mount by default.
Like all other top-tier mounts, UFO has unlimited flight. It’s excellent against flying enemies, especially if you’re a melee character. The item can also be useful when building structures or doing various tasks on the map. Its only downside is that it dismounts in water and other liquids.
2. Cute Fishron (Shrimpy Truffle)
Cute Fishron basic stats:
| Requires | Duke Fishron (only on Expert mode) |
| Height | Infinite |
| Speed | 33 (horizontal speed) 41 (vertical speed) 53 (diagonal speed) 82 (when in liquids) 67 (when below 50% health or six seconds after exiting liquids) 5 (upon making contact with a block) |
| Effects | Infinite flight The player causes extra damage while in liquids Slower movement on land |
Cute Fishron is one of the few water-focused mounts increasing your damage while in liquids. However, it also performs really well in the air, giving the player unlimited flight.
The mount has different speeds depending on the situation. It gains a slight boost when exiting the water and when a player is below 50% health. This makes it a valuable accessory during tough boss fights. However, if you hit an obstacle, its speed will drop almost to a minimum.
1. Drill (Drill Containment Unit)
Drill basic stats:
| Requires | Luminite Bar (40), Shroomite Bar (40), Meteorite Bar (40), Hellstone Bar (40), Spectre Bar (40), and Chlorophyte Bar (40) assembled at Orichalcum or Mythril Anvil |
| Height | Infinite |
| Speed | 31 (horizontal speed) 41 (vertical speed) 51 (diagonal speed) |
| Effects | Infinite flight Prevents players from using items while mounted Allows mining of tiles |
The tricky thing about the Drill is that it prevents you from using weapons and other items. So, you can’t use it for boss fights. Mounts like Cute Fishron or UFO are much more suitable for these situations.
In many ways, Drill is a utility tool that excels at mining ores and other blocks. It is more efficient than any pickaxe or drill in the game, allowing you to collect enormous amounts of materials in a short time span. To make things even better, it doesn’t dismount and has infinite flight.
Aside from collecting ores, this mount is fantastic for destroying the Corrupt, Crimson, and Hallow biome. Although it’s available late in a playthrough, after defeating Moon Lord, it’s an excellent tool that you can transfer to other characters.